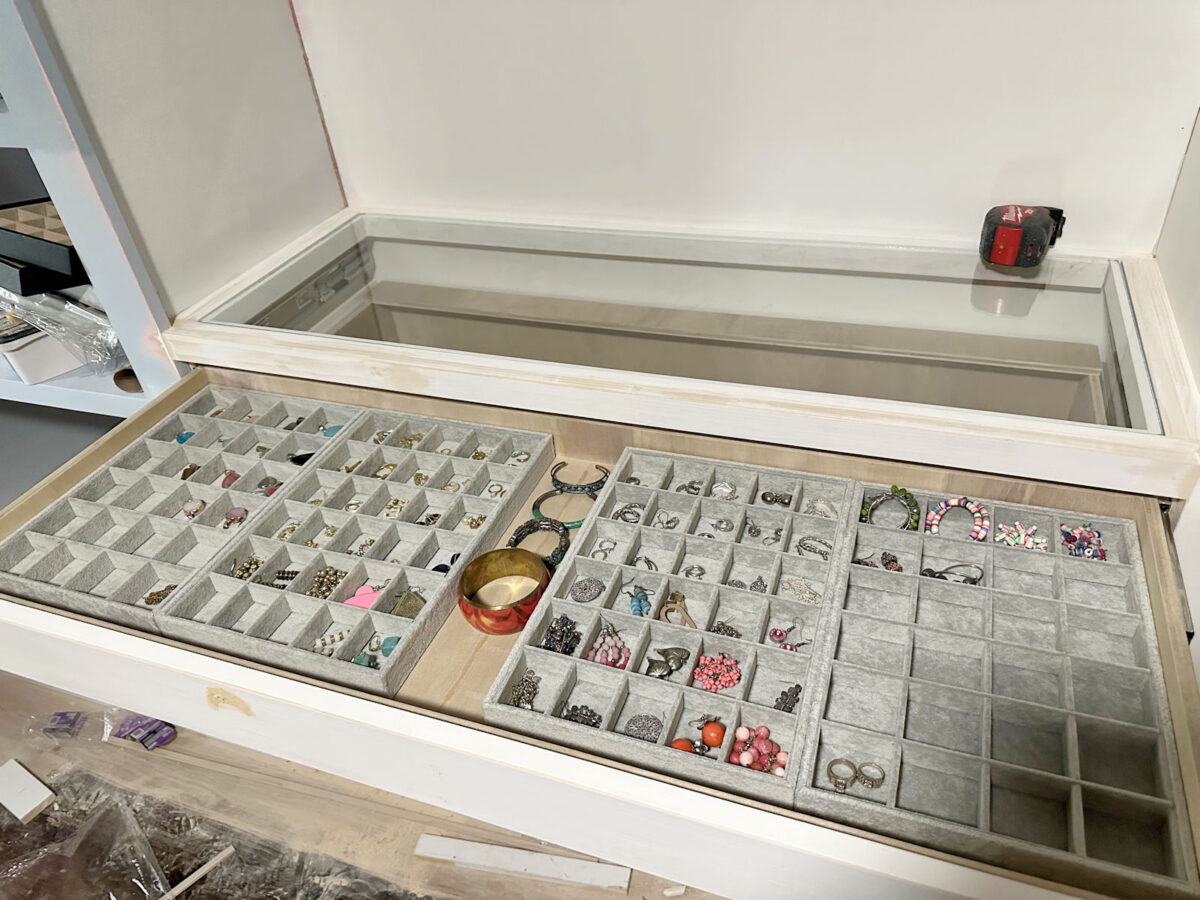
A couple of days ago, I showed y’all the jewelry drawer with the glass top that I built in my walk-in closet. It’s a pretty big drawer with interior dimensions of 41 5/8″ x 15″.
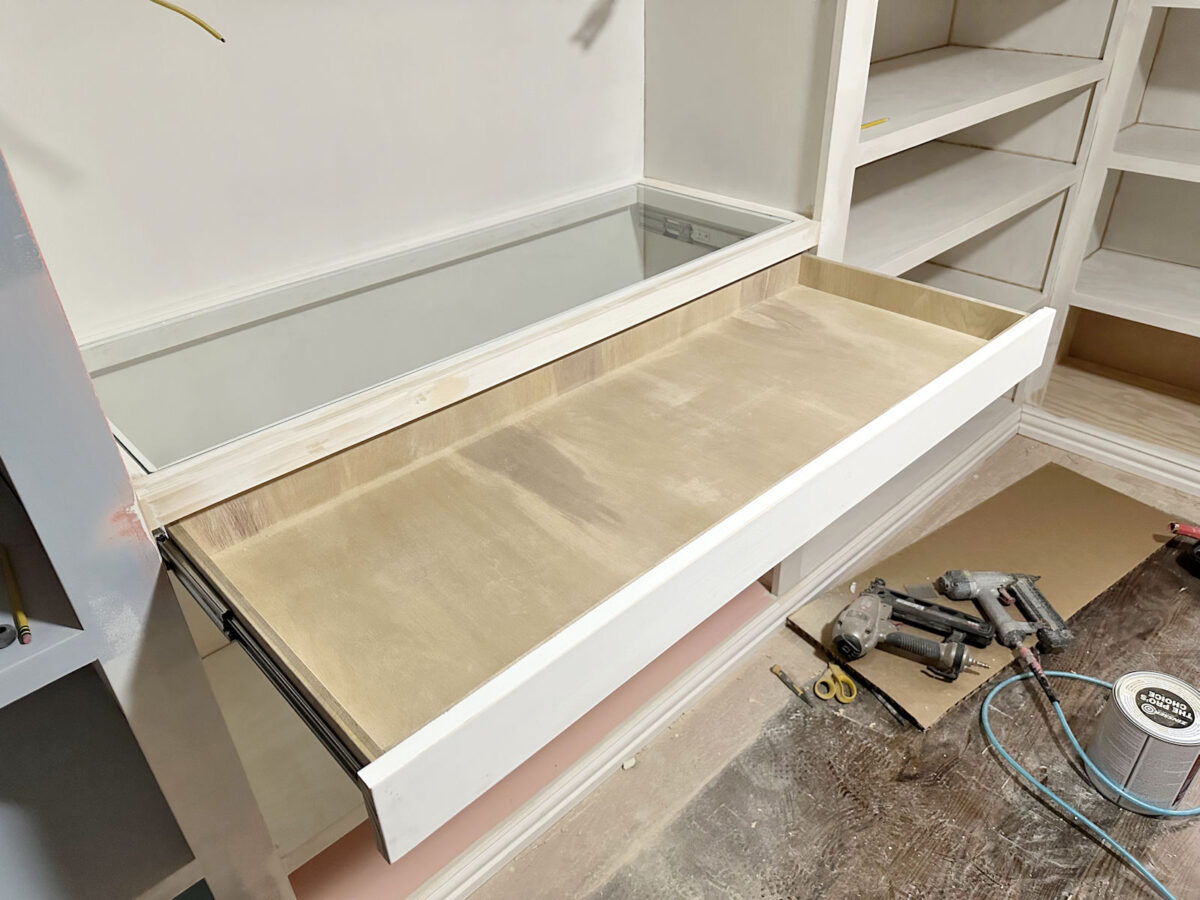
And it has a glass countertop over it so that everything shows when the drawer is closed.
I had looked at all kinds of options for jewelry drawer inserts, from Amazon options to custom options. I had really hoped to have something custom made for the drawer, but I very quickly realized that wasn’t going to be an option for me. I found one website where you can design your own, but first, their custom options only went up to 36″ wide. And if I’m going to spend money on something custom made, it needed to fit the entire drawer width.
But I started playing around with their online customizer just to get an idea of the price of something like that. Let’s just say I stopped designing (i.e., I stopped adding compartments to the design) when the price surpassed $500. There’s just simply no way I can justify paying over $500 for a custom-designed jewelry drawer insert when I’m just storing inexpensive jewelry. If I were a collector of fine jewelry, I could probably justify spending that much to display it. But literally, the only expensive piece of jewelry I own is my wedding ring. Everything else is just inexpensive, fun jewelry that I buy at random places–drug stores, Hobby Lobby, Amazon, etc.–when I see something I like.
So then I thought that I could build my own compartments. That way, I could build it to fit the precise dimensions of the drawer. So I picked up a few of these poplar boards from Home Depot. These are 2.5″ x 48″.
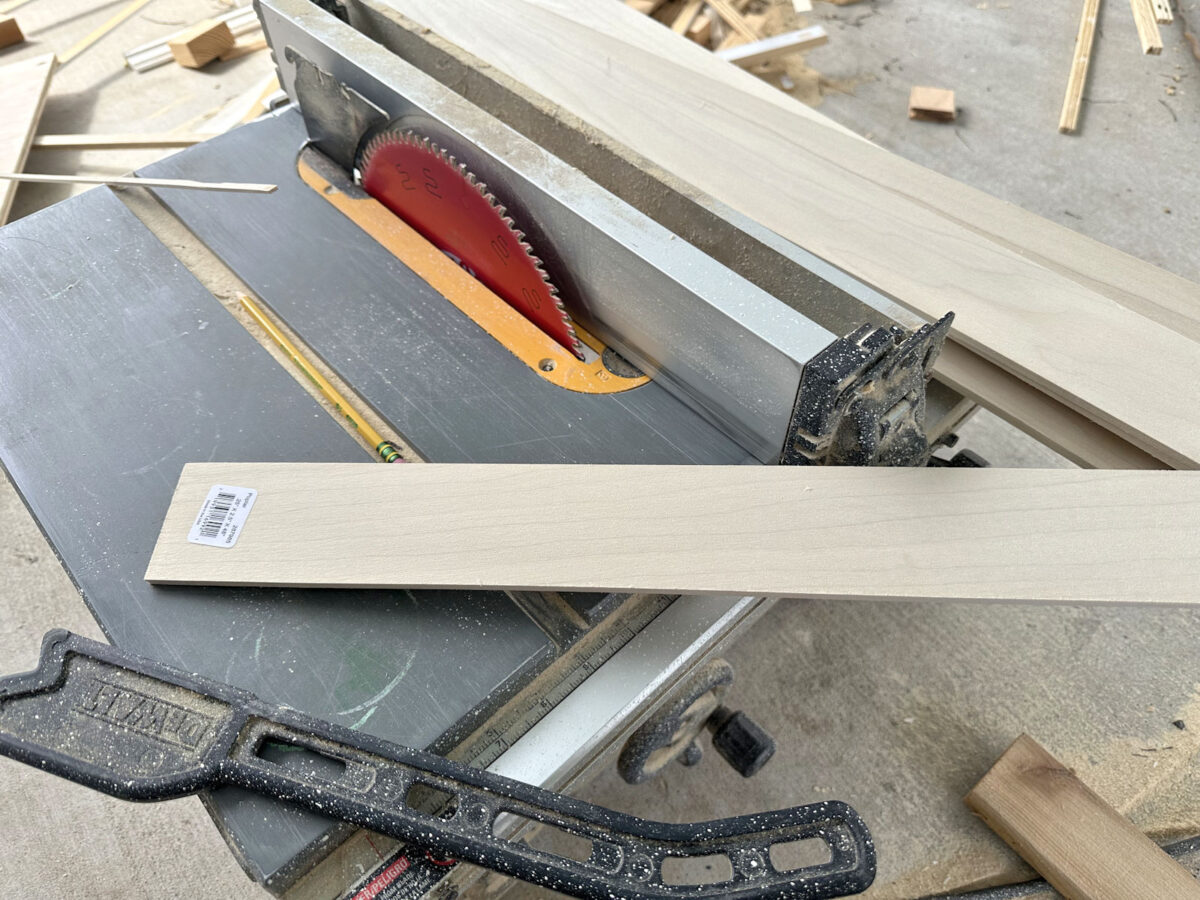
And they’re 1/4″ thick, which I thought made them perfect for this project.
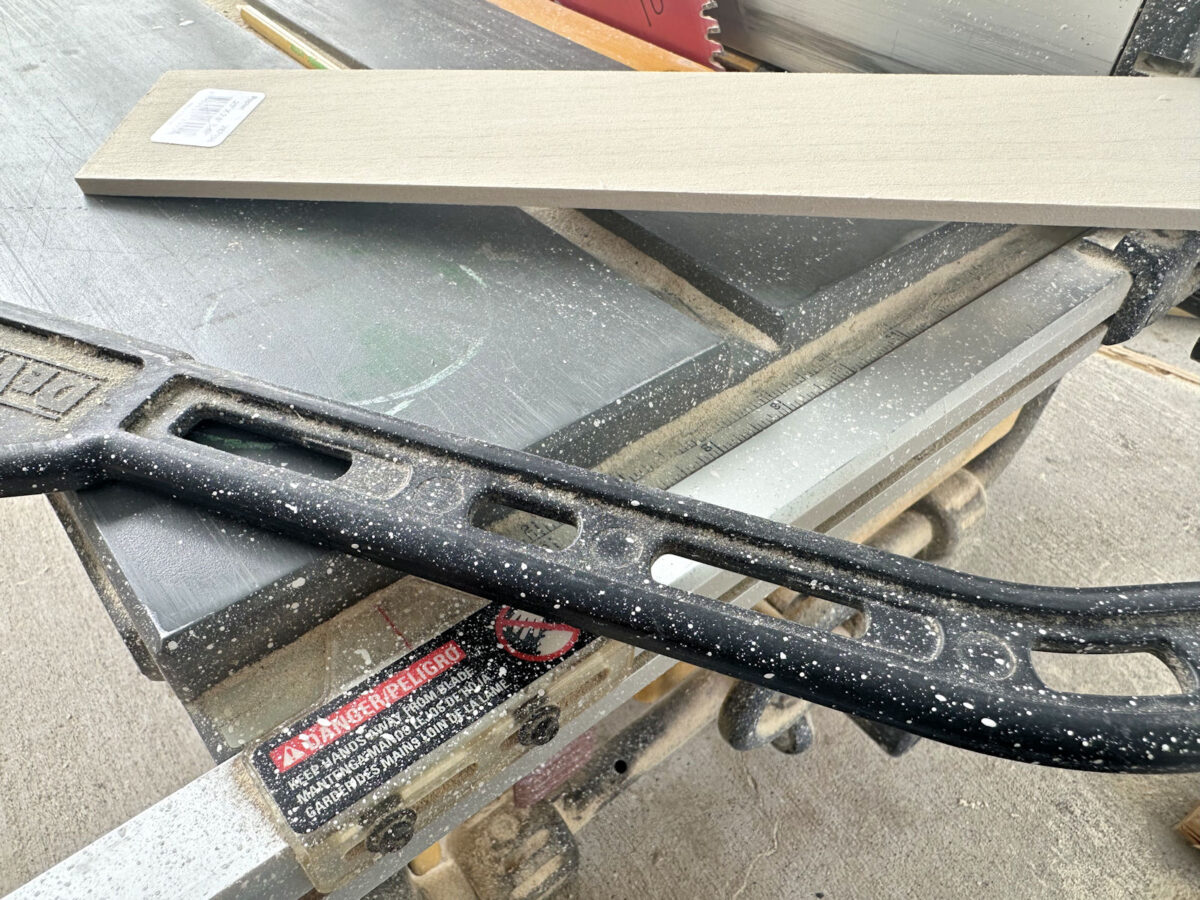
My idea was to rip them down to 3/4″ strips, cut them to the lengths needed, and build a grid inside the drawer. Then I wanted to stain the inside of the drawer, as well as the grid, in a very light, warm brown stain color.
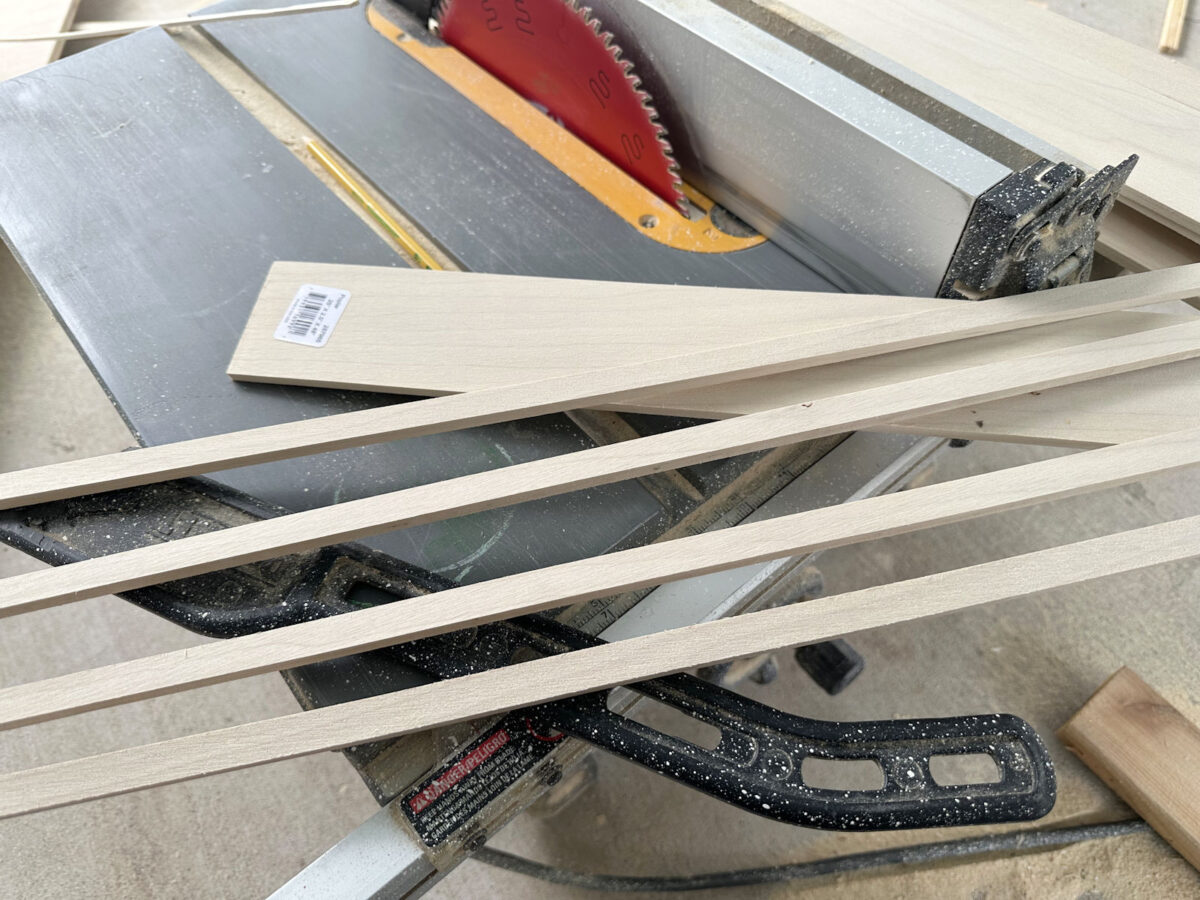
But it didn’t take long for me to realize that I’d never get these pieces together just right in a way that I was satisfied with. I tried putting them together with hot glue, but I couldn’t use enough glue to keep them together. If I used too much glue, it would squish out the sides, and then those pieces wouldn’t accept stain. If I used too little, they wouldn’t hold together. I also tried using wood glue, but that dries so slowly that I’d mess up the first section as I started trying to assemble the second section.
But this wasn’t one of those projects. With all of the big projects that still need to be done in the walk-in closet (like painting the cabinets and building the center island), the last thing I wanted to do was spend my time doing this random time-consuming project that I was about 95% sure I wouldn’t even be satisfied with when it was finished.
Back online I went. I have to admit that for about an hour last night, I went back to the idea of a custom insert. I was actually very tempted when I found this company that will do custom acrylic inserts for just about any purpose you can think of. There are times when paying a high price for something is worth the convenience to me. But again, because of the size of the drawer, I knew I’d be looking at a price of several hundred dollars. I just couldn’t make myself do it.
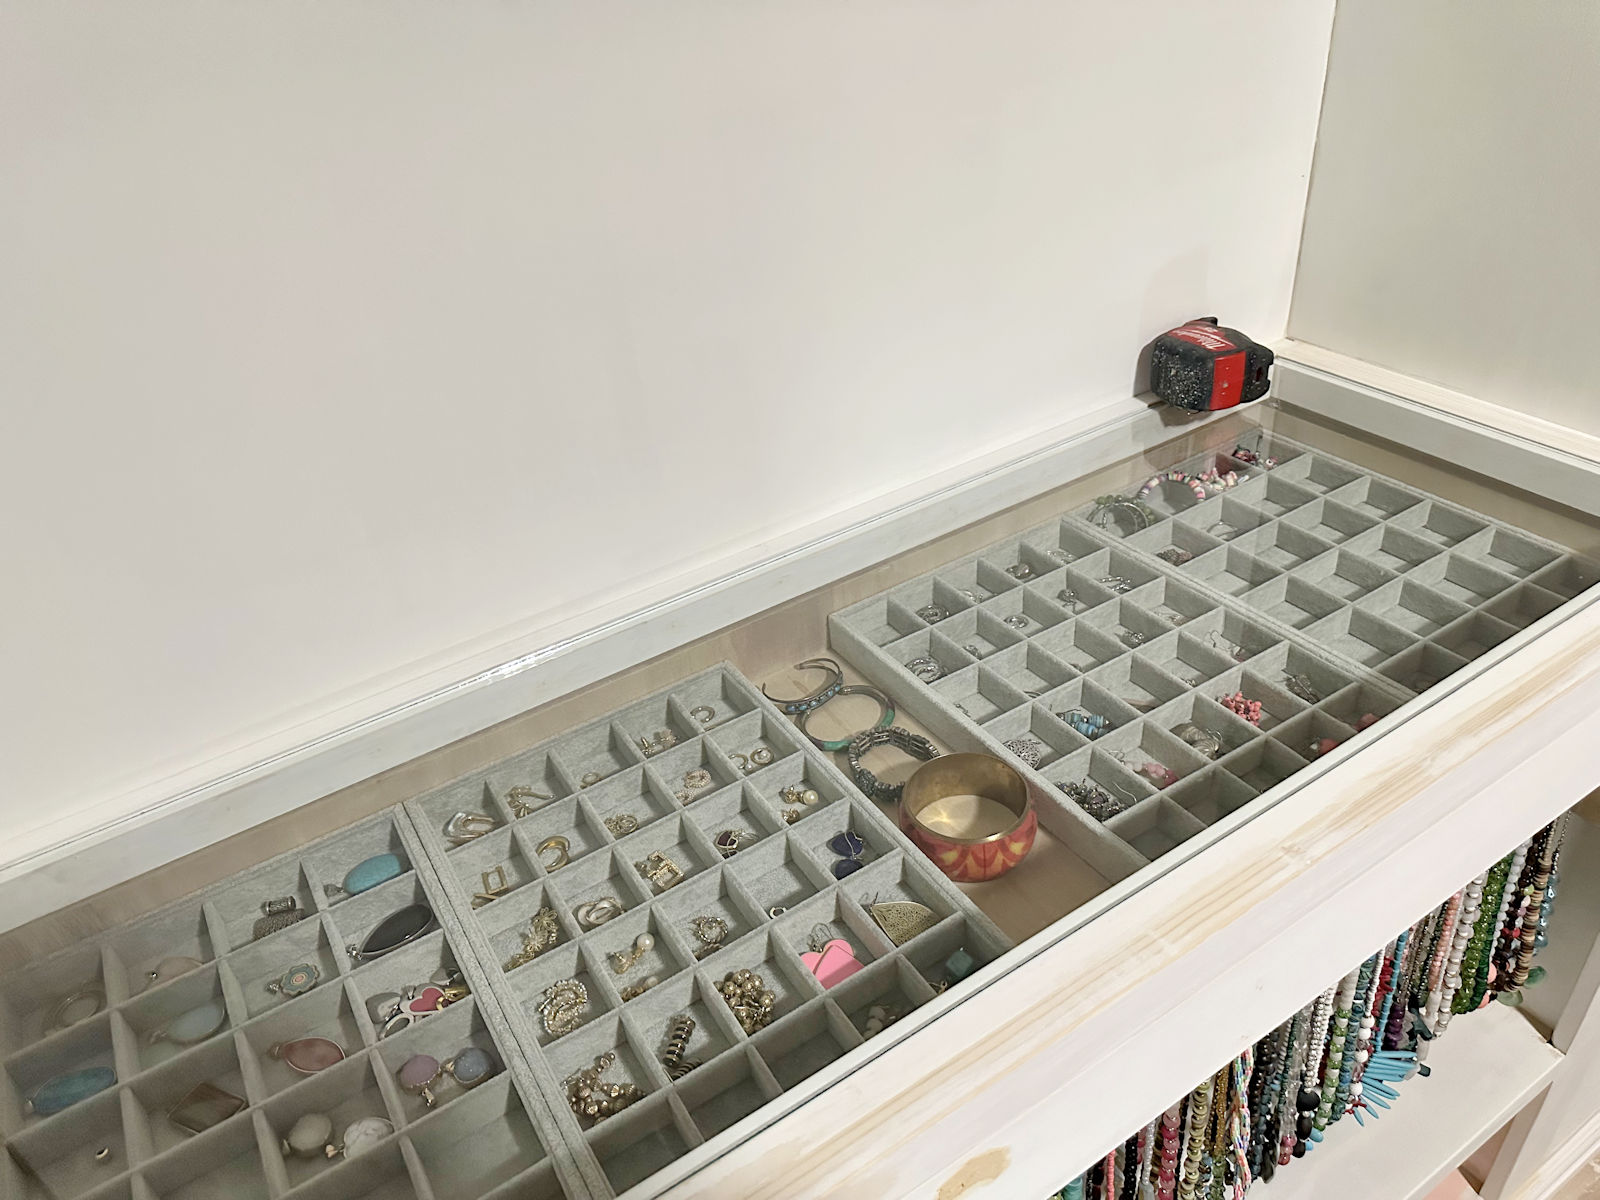
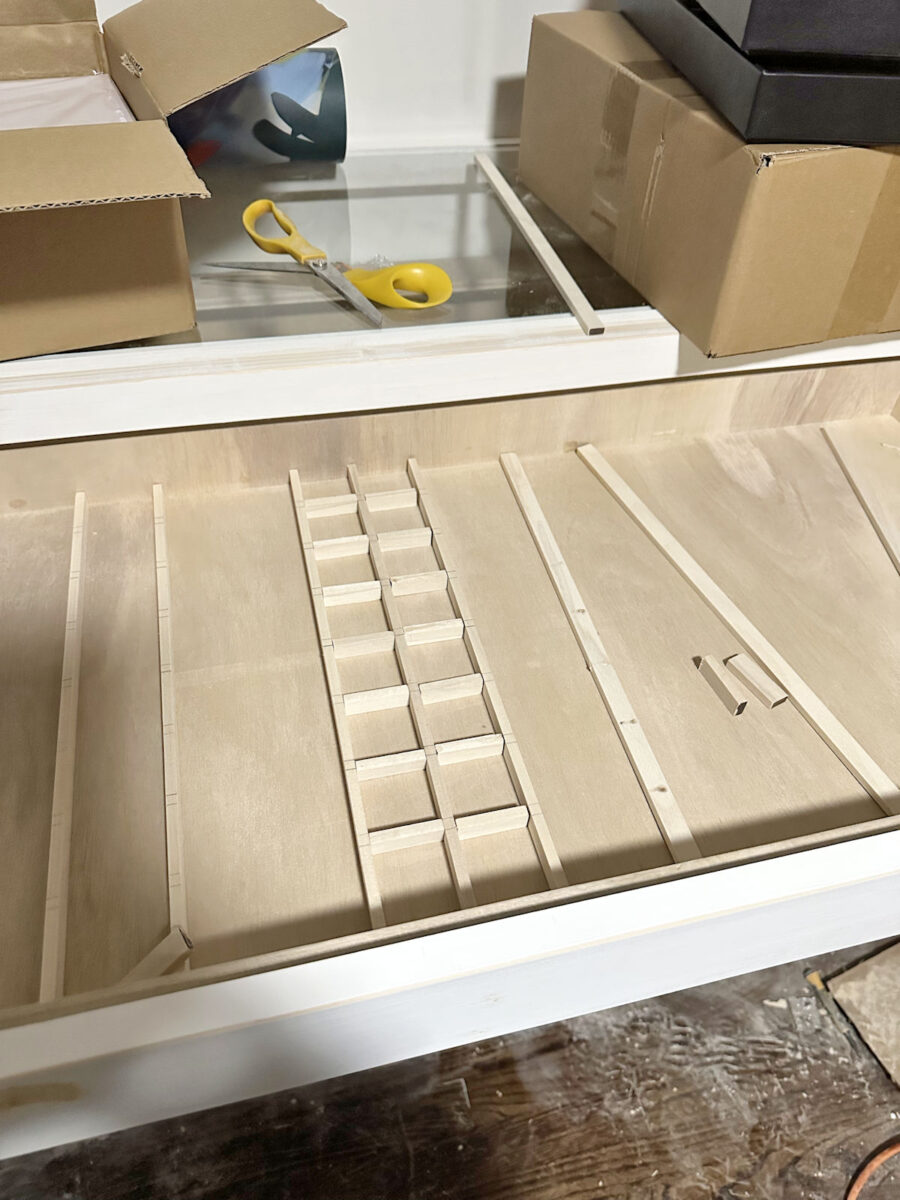
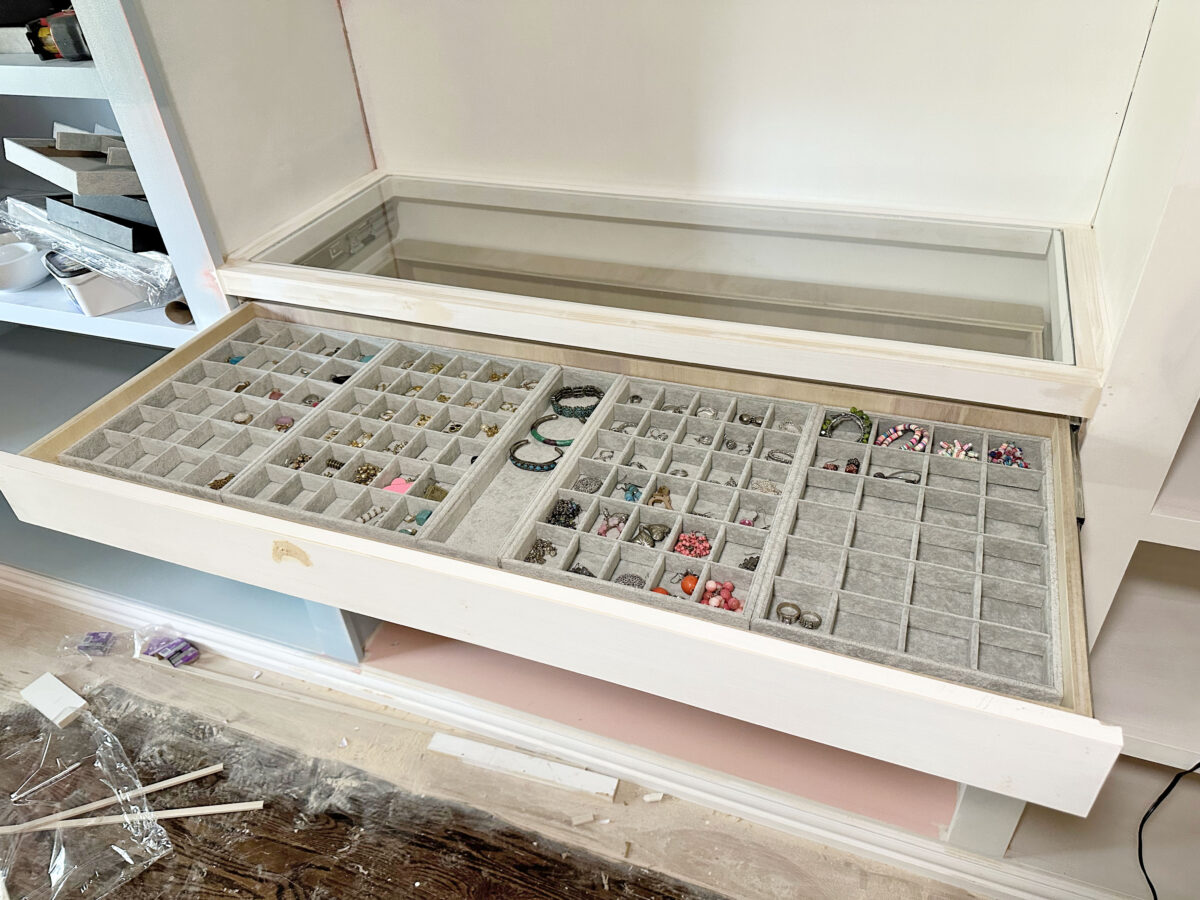
So last night, I searched high and low on Amazon for inserts that I thought might work in my drawer. I couldn’t find the perfect size (not shocking), but I finally decided to go with this set of four in a light gray (affiliate link). Each set comes with four different grid sizes.
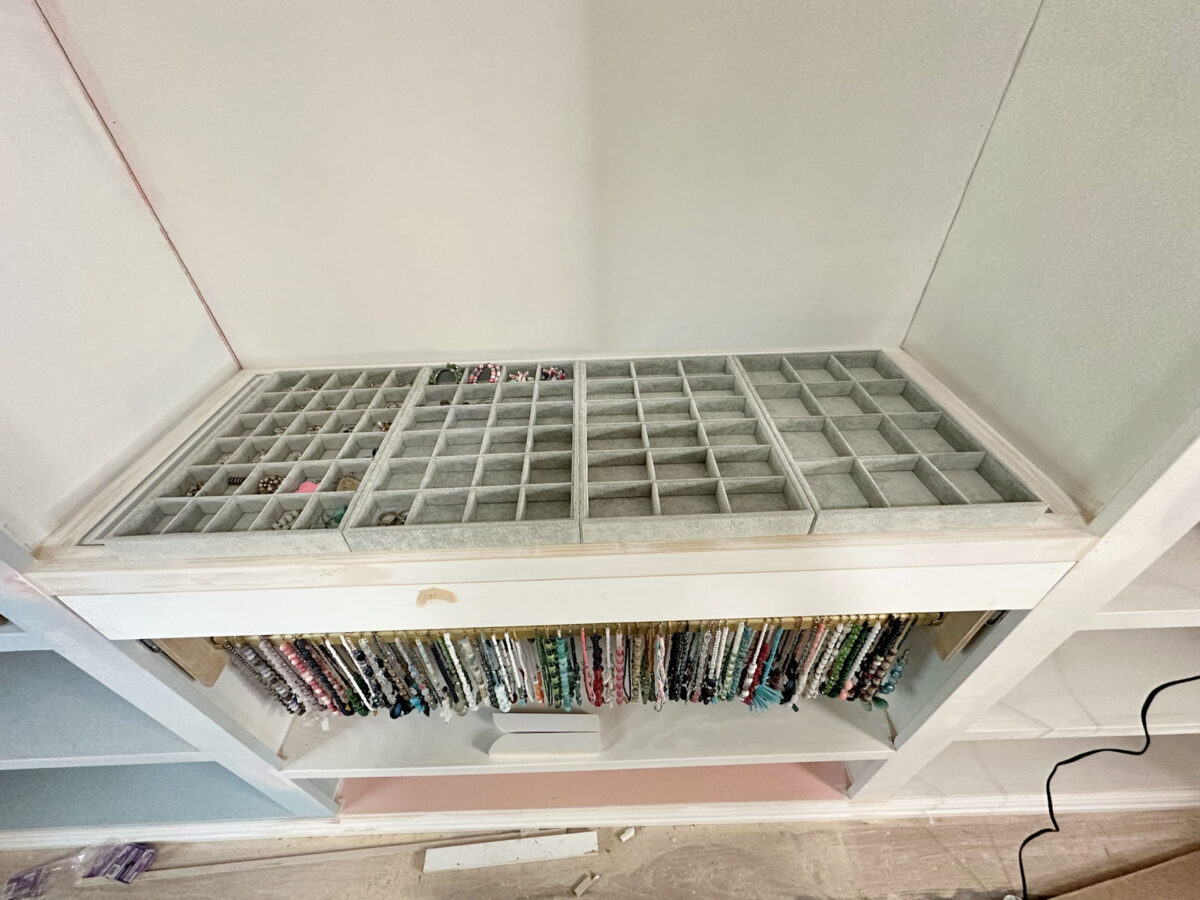
I knew that I wanted two of the same size since most of my earrings are pretty small. And I wasn’t sure what other size(s) I wanted to use, so I ended up ordering two sets. (I LOVE Amazon overnight delivery!! Hooray for immediate gratification! I ordered before I went to bed, and it was on my doorstep when I woke up. 😀 )

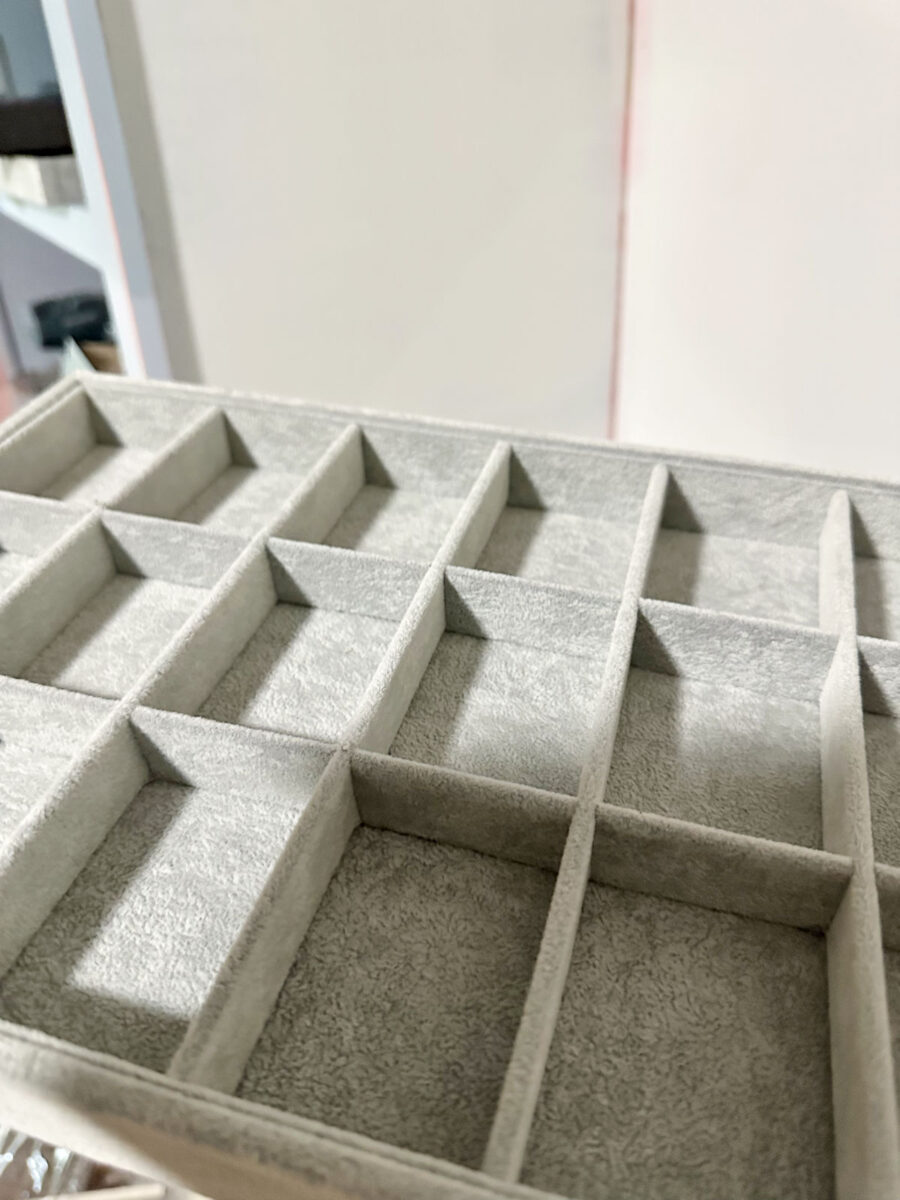
The color is slightly darker than I had hoped, but they’re very well made and sturdy.
I’m actually quite excited about how they look! They’re not a perfect fit, but it sure beats the heck out of paying over $500 for a custom insert.

Even with buying two sets, I still paid way under $100 for them.
Four of them fit into my drawer, and my plan is to color match a sample size of paint to the gray so that I can paint the whole inside of the drawer in the same color.

There is a 1-inch gap at the front, but that doesn’t even show when the drawer is closed. So that doesn’t bother me at all.

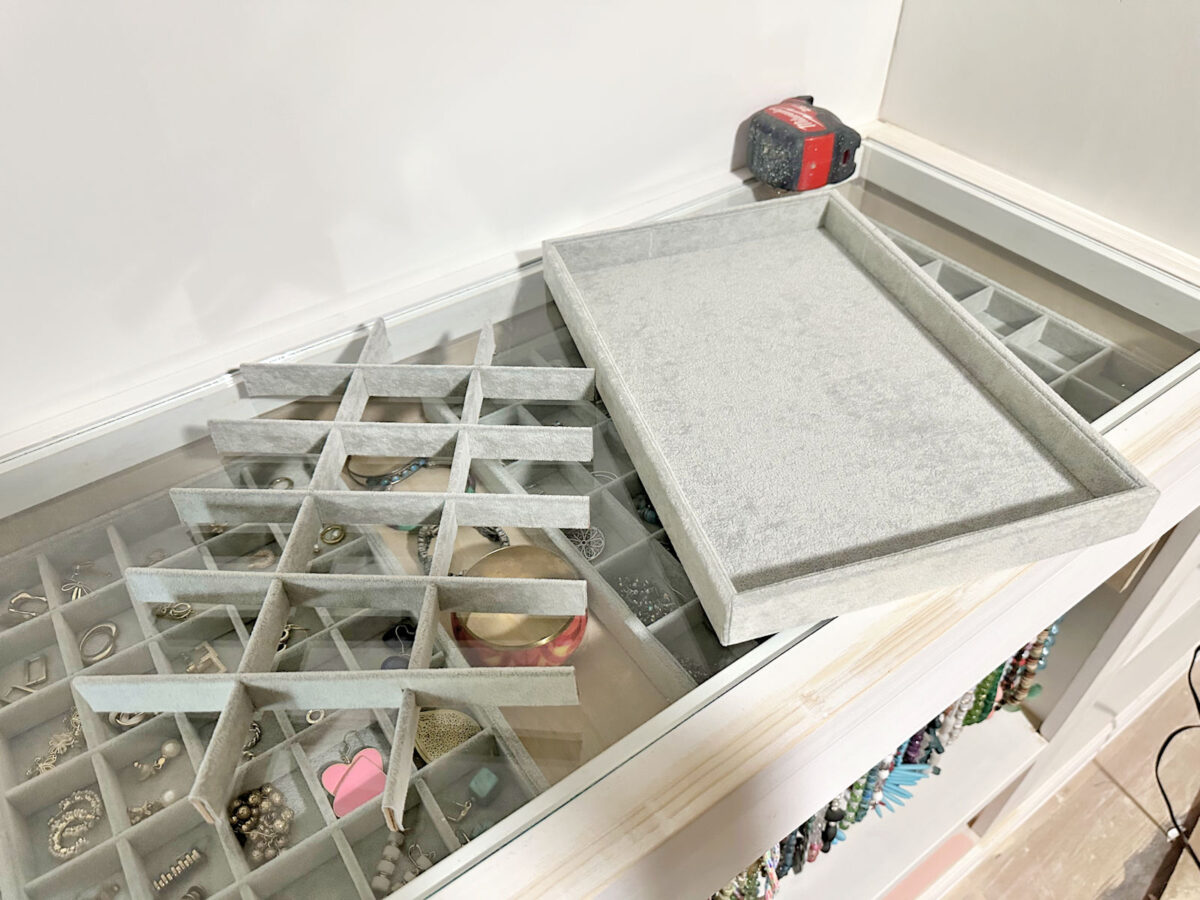
And since I have four trays left over, I’m considering trying to cut down one of the extra trays (the grids are removable) to fill in the extra 3.5-inch space in the middle to get a fully customized size and have the whole drawer, from left to right, filled with trays. I have no idea if I can do it, but you can be certain that I’ll try!
Anyway, I’m very pleased with how this is turning out. I think once I get the inside of the drawer painted to match the trays, it’s going to look fantastic! And of course, I still plan to add tape lights inside the drawer and inside the necklace compartment as well.
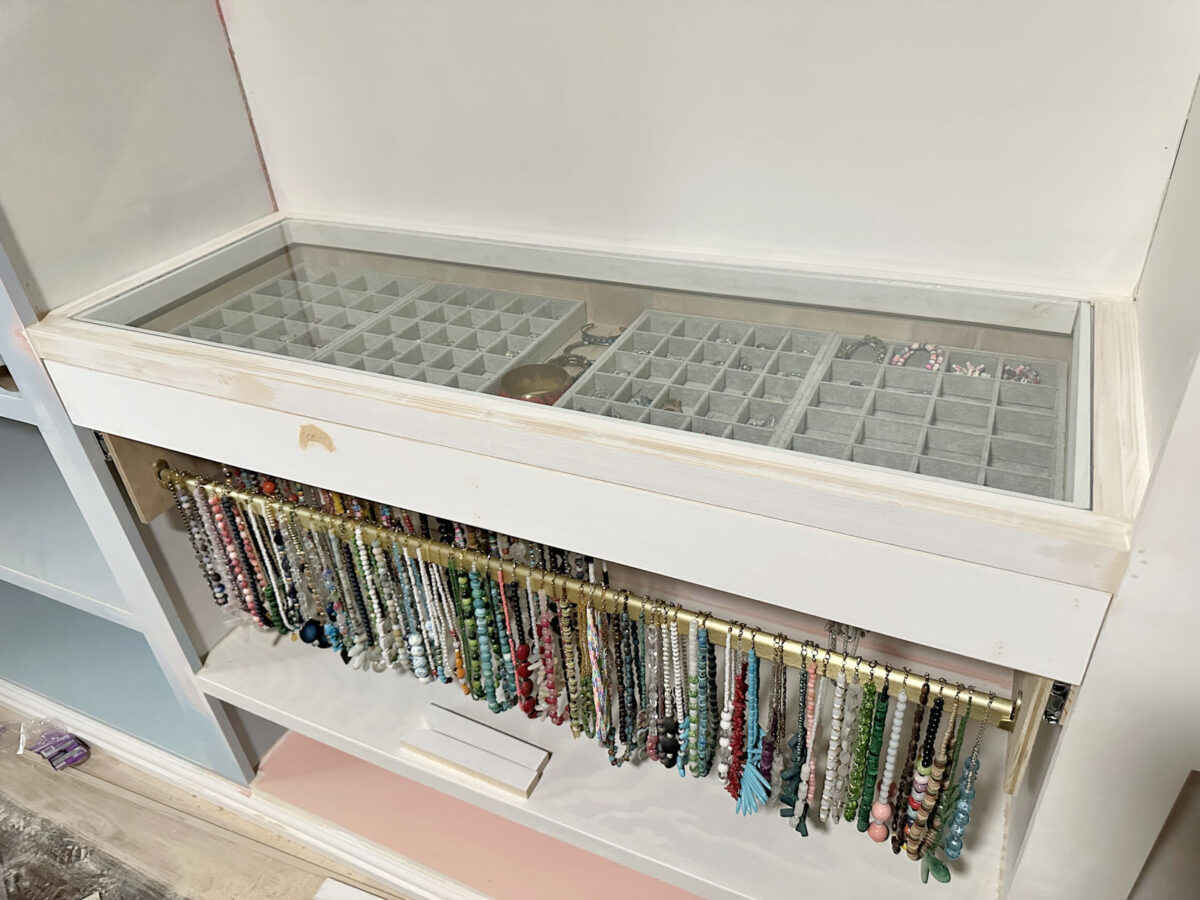
I’m also still trying to work out the details of how I want to finish off the necklace pull-out storage. Y’all had some great ideas on that, so I’m still weighing the options.
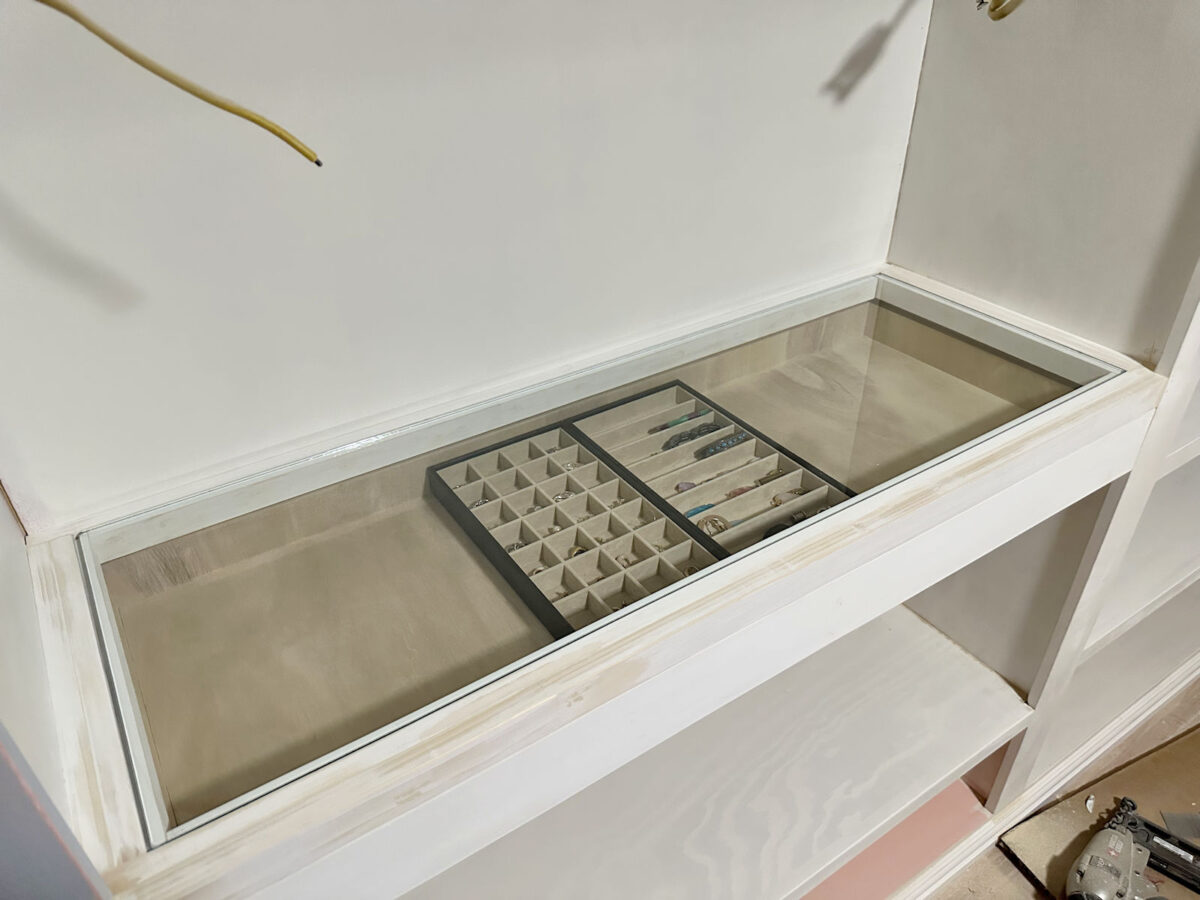
UPDATE: I did it! I used one of the extra trays, cut it down, and put it back together to fill the extra space. And now I have what looks like a fully custom jewelry drawer with inserts that fit perfectly into the 41 4/8-width of my drawer. While having a custom insert made for this drawer would have cost me well over $500, this option using these Amazon trays (affiliate link) and cutting down one of the trays to fit cost me $65.88 for two sets, plus about an hour of time to remake one of the trays for a perfect fit.

It was really very simple to do. These trays are made of a combination of thin cardboard and heavy cardboard, so all of this could be done with scissors and a razor blade. I first removed this strip of velvet-covered cardboard from around the inside a set it aside to reuse.

I removed it very gently so that none of the velvet would come off, and so that the cardboard didn’t get bent as I removed it.

And then I could easily separate the sides from the bottom of the tray. I used a razor blade to cut the bottom down to the 3.5-inch width that I needed to fill the space.

And then I put the bottom piece in place and then put the two long side pieces in place.

Then I used my razor blade to cut down the top and bottom side pieces. This was the trickiest part of the whole process because they kind of had to be mitered. Doing a mitered corner with a razor blade isn’t the easiest thing to do, but I just worked with it patiently until I got it to fit. It wasn’t perfect, but it was good enough. Once the cardboard was cut to size, I carefully trimmed the velvet with scissors to give it clean edges on the corners. And then I used hot glue to glue those end pieces to the side pieces.

And finally, I cut down those inside strips to fit and glued those back on to give it a finished look. It was a pretty simple process. And look how good that looks now! I have a fully customized fit, and I saved at least $430 over what a custom insert would have cost for this drawer!

I still need to paint the inside of the drawer to match the inserts, and I think it will look so good once it’s all done.

I know it’s probably silly, but this is one of those small details that I get so excited about. I like things to look custom, but I don’t always like paying the price for custom-made items. That’s why I DIY so much. But there’s no way I wanted to make the whole velvet-covered insert from scratch. This was a good compromise between store-bought and custom. And you can’t beat that price!
Here’s what it looked like before:
And here’s the customized look…
It’s a small detail, but it’s so much better!

Addicted 2 Decorating is where I share my DIY and decorating journey as I remodel and decorate the 1948 fixer upper that my husband, Matt, and I bought in 2013. Matt has M.S. and is unable to do physical work, so I do the majority of the work on the house by myself. You can learn more about me here.
Trending Products